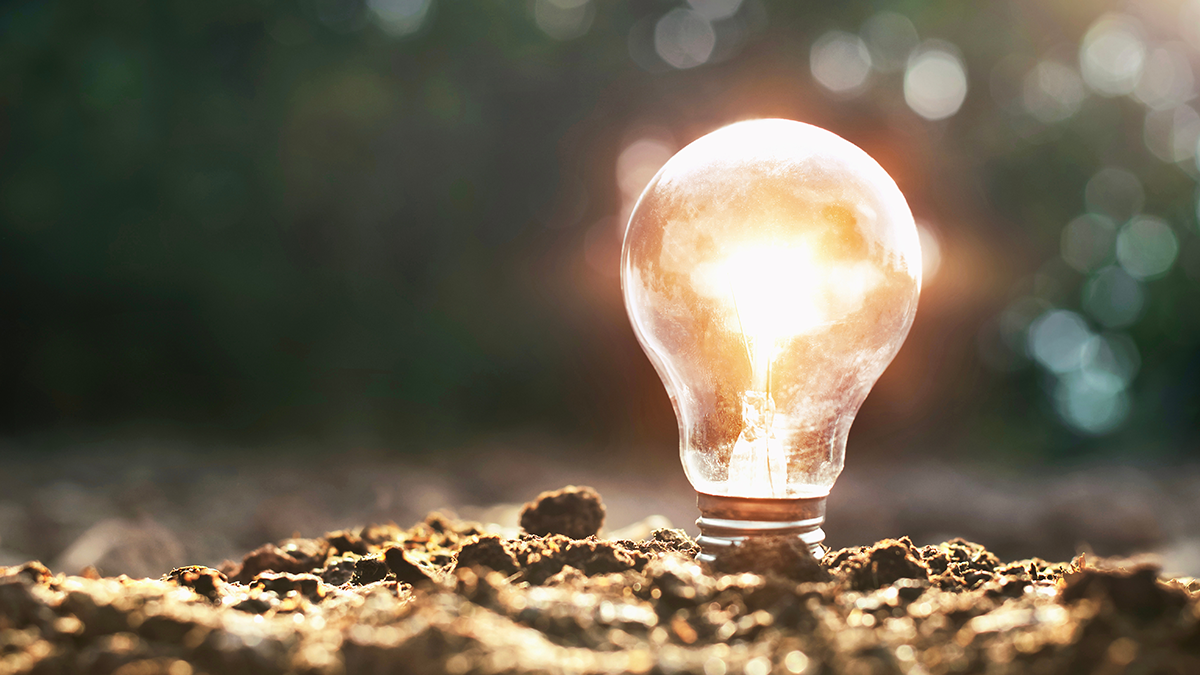
Exploring the Power of the Sun: Three Fun Science Projects for Teens
The sun is Earth’s powerful and ever-present source of energy that can be harnessed for a variety of stimulating science projects. From creating your own time-telling device to cooking food with solar power, these hands-on activities are perfect for kids and teens interested in exploring the sun’s incredible potential. These projects offer an electrifying mix of creativity, engineering, and science while promoting environmental awareness alongside persistence, innovation, critical thinking, and a variety of other essential employability skills. Plus, these are great ways to get students outside and appreciate the natural world in a whole new way!
1. LEGO Sundials: Time-Telling with Sun Power
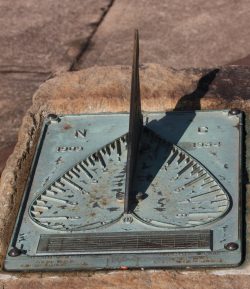
What is a sundial?
A sundial uses the position of the sun’s shadow to tell the time. In this project, you’ll use LEGO bricks to create a simple yet effective sundial that shows how ancient civilizations tracked time using just the sun.
Materials:
- LEGO bricks (variety of shapes)
- A small stick or straw (for the gnomon)
- A piece of cardboard or a flat surface
- A ruler
- A protractor (optional)
- A compass (optional)
Instructions:
- Build Your Base:
Using your LEGO bricks, create a circular or square base for your sundial. The base should be sturdy and large enough to support the gnomon (the stick). - Attach the Gnomon:
Place the stick or straw in the center of your base. It should stand upright and be fixed firmly in place. This will be the part that casts the shadow. - Position Your Sundial:
Place your sundial outside where it can catch the sunlight. Use a compass to point the sundial north (in the Northern Hemisphere) or south (in the Southern Hemisphere). This step ensures the shadow moves correctly throughout the day. - Mark the Hours:
As the sun moves through the sky, the gnomon will cast a shadow. At different times of the day, use a marker or pencil to mark the shadow’s position. Each mark represents a specific time of day. - Check Your Results:
After a full day of shadow tracking, you’ll have a working sundial! Compare the times on your sundial to a regular clock to see how accurate your sundial is.
2. Solar Oven: Cooking with Sunshine
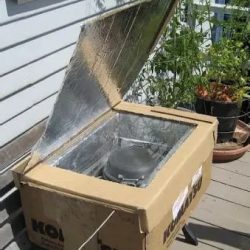
What is a solar oven?
A solar oven uses the sun’s energy to cook food without the need for electricity or gas. Try to create your own solar oven to bake s’mores, heat up nachos, or cook other simple treats!
Materials:
- A pizza box (or another cardboard box)
- Aluminum foil
- Plastic wrap
- Black construction paper
- Tape
- Scissors
- A stick (for propping open the lid)
- Food to cook (such as s’mores ingredients)
Instructions:
- Prepare the Pizza Box:
Cut a flap on the lid of the pizza box, leaving about an inch around the edges. This flap will be the window that helps direct sunlight into the box. - Line with Aluminum Foil:
Line the inside of the pizza box (including the flap) with aluminum foil. The foil will reflect the sun’s rays into the box and help concentrate the heat. - Add the Black Paper:
Tape black construction paper to the bottom of the pizza box. The dark color will absorb heat, helping to cook your food more efficiently. - Cover with Plastic Wrap:
Tape a sheet of plastic wrap over the opening of the box to create an airtight seal. This will trap heat inside the box and make it hotter. - Place and Cook:
Place your food (such as s’mores or nachos) on the black paper inside the box. Position the box so that the sun shines directly on the aluminum foil flap. Adjust the flap to reflect the sun into the box, and check periodically to see how your food is cooking.
3. Sun Prints: Creating Art with the Sun’s Rays

What is a sun print?
Sun prints, also known as cyanotypes, are a fun way to create artwork using sunlight. Test the capabilities of photo-sensitive paper to create prints of leaves, flowers, or other objects.
Materials:
- Sunprint paper, otherwise known as photographic paper (available online or at craft stores)
- Objects to create prints (leaves, flowers, etc.)
- A flat surface to work on (a table or countertop)
- A sunny spot outdoors
- Water and a shallow tray or basin
Instructions:
- Prepare the Paper:
Lay your Sunprint paper flat on a clean, dry surface. Be sure to handle it carefully, as it is sensitive to light. - Arrange Your Objects:
Place the objects you want to print (like leaves or flowers) directly on top of the Sunprint paper. Make sure they are positioned exactly how you want the print to appear. - Expose to Sunlight:
Take the paper outside and place it in direct sunlight. The paper will begin to turn lighter as it reacts to the sun’s UV rays. Leave it outside for about 2-5 minutes. - Rinse the Paper:
Once the paper has been exposed to the sun, remove the objects and quickly rinse the paper in water. This stops the reaction and reveals the print. - Dry and Display:
Let your Sunprint dry in the air. Once it’s dry, you can frame it or display it as a unique piece of art!
These projects not only let teens engage with the power of the sun, they also promote creative thinking, problem-solving skills, and environmental awareness. Whether building a sundial, cooking with solar energy, or making sun prints, these activities offer exciting opportunities to explore renewable energy and create something amazing using the sun’s natural power!